Last update of this page: March 17, 2026
Former AI containers on LUMI-G
Before the January 2026 update, AI containers for LUMI were provided by AMD and wrapper scripts were developed by the LUST. Since then, the LUMI AI Factory has taken over the development of such containers. The more recent ones of the former containers remain available though as long as they work well for most users.
Some of the materials in this text are still outdated. This is particularly true for the
discussion about cotainr, as the documentation of that tool was outdated when this text
was last revised.
Former pre-built AI containers
LUST with the help of AMD has built some containers with popular AI software. These containers contain a ROCm version that is appropriate for the software, use Conda for some components, but have several of the performance critical components built specifically for LUMI for near-optimal performance. Depending on the software they also contain a RCCL library with the appropriate plugin to work well on the Slingshot 11 interconnect, or a horovod compiled to use Cray MPICH.
Some of the containers can be provided through a module that is user-installable with EasyBuild.
That module sets the SINGULARITY_BIND environment variable
to make all your regular files available in the container and to ensure that all software from the
system that is needed in the container, is also there. The module will also provide
an environment variable to refer to the container (name with full path) to make it easy to refer to
the container in job scripts. Some of the modules also provide some scripts that may make using the containers easier in some standard scenarios.
Alternatively, the user support team also provides the singularity-AI-bindings module discussed above,
for users who want to run the containers as manually as possible yet want an
easy way to deal with the necessary bindings of user file systems and HPE Cray PE components needed
from the system (see also course materials for the AI training/workshop).
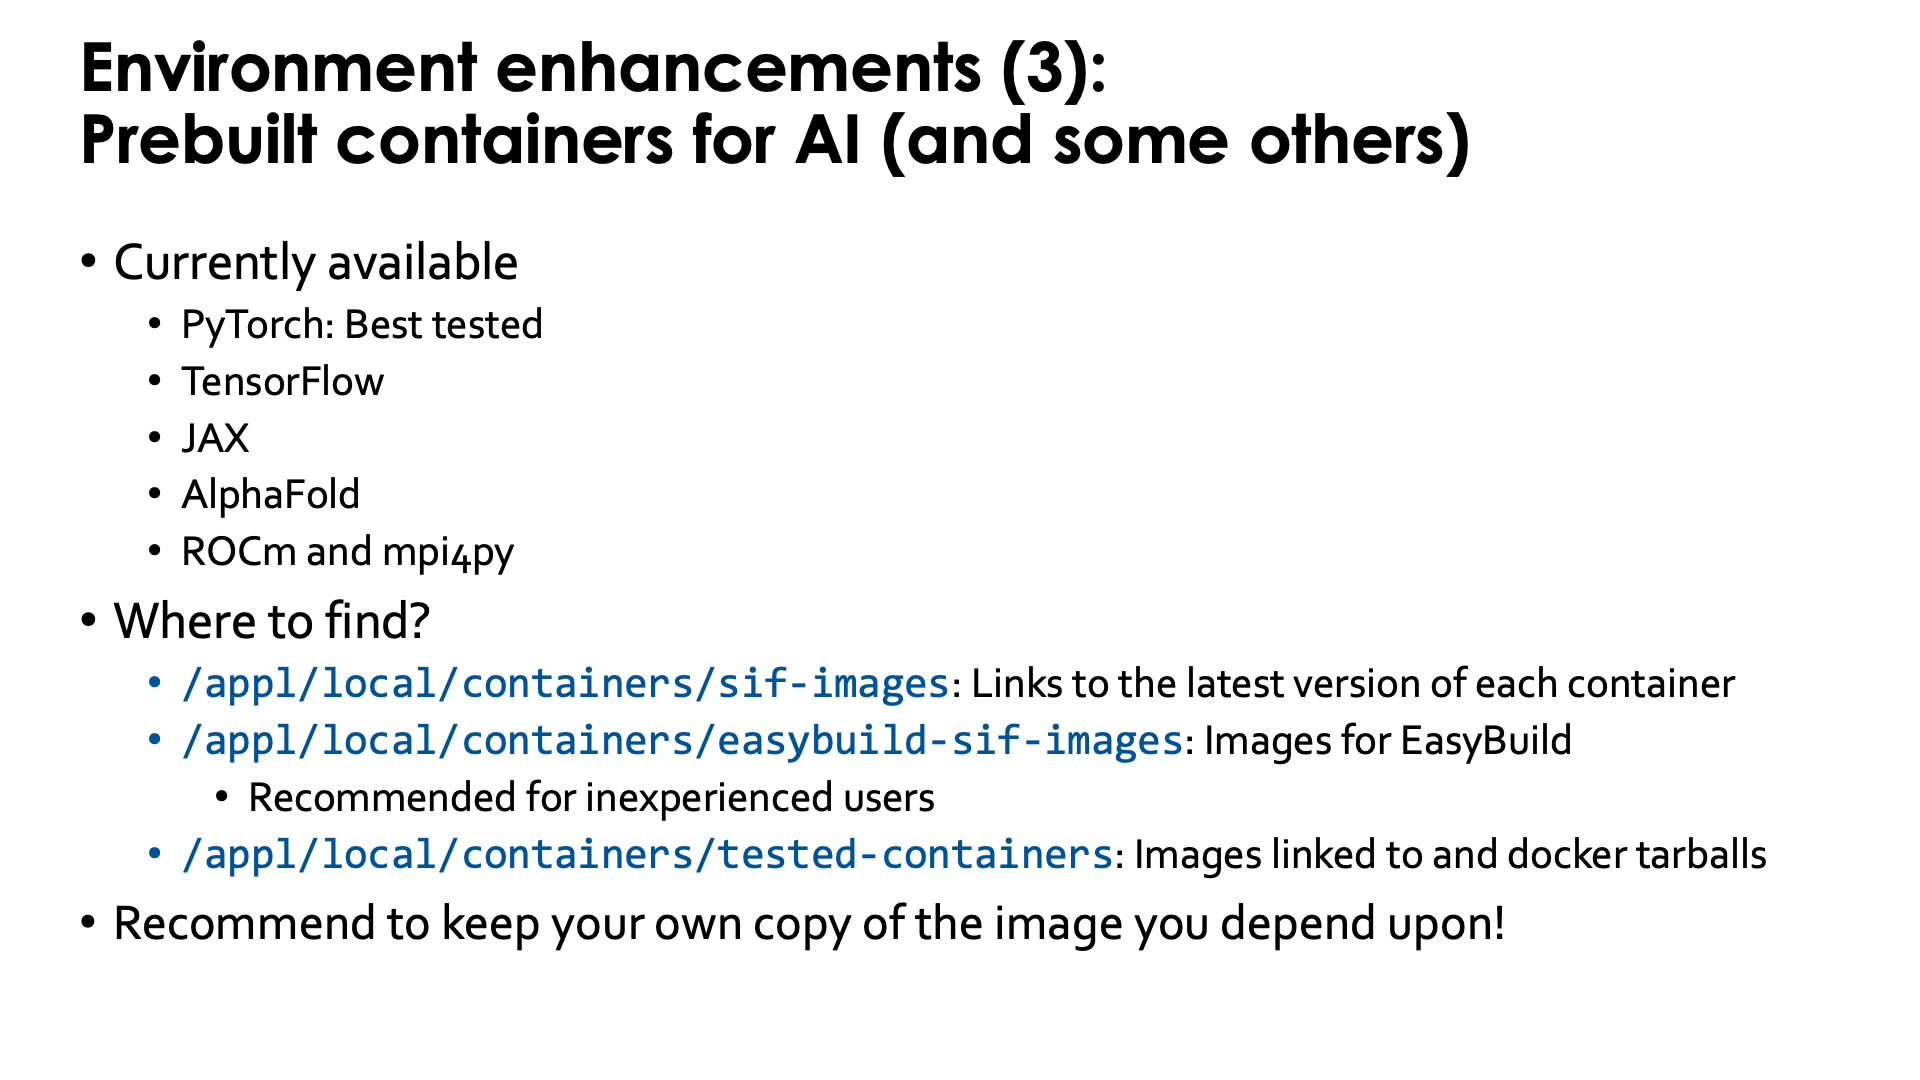
These containers can be found through the LUMI Software Library and are marked with a container label. There are still containers for:
- PyTorch, which is the best tested and most developed one,
- JAX,
- TensorFlow,
- ROCm and
- mpi4py.
Of these, the PyTorch containers are by far the most popular ones among the LUMI users,
probably followed by the ROCm containers as basis to build their own containers using
cotainr or other tools.
Running the AI containers - complicated way without modules
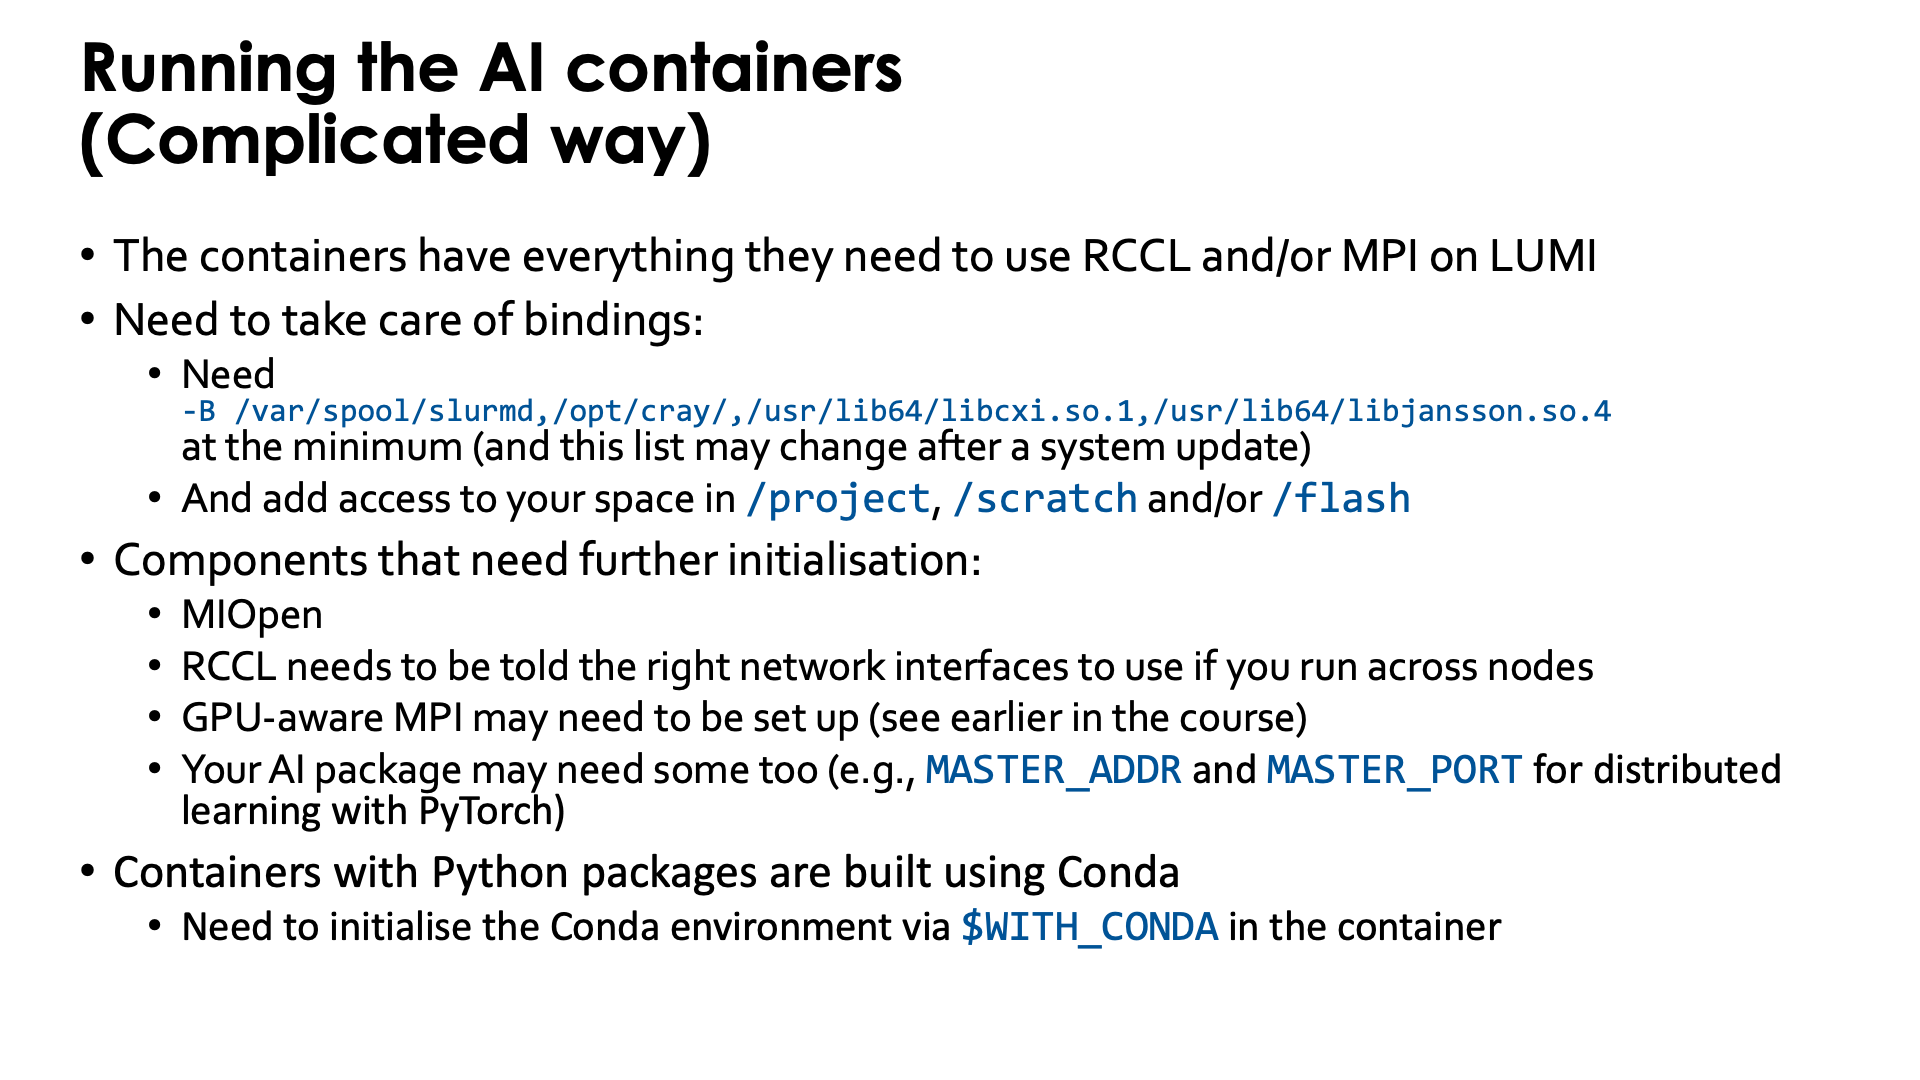
The containers that we provide have everything needed to use RCCL and/or MPI on LUMI.
It is not needed to use the singularity-bindings/system module described earlier as that module
tries to bind too much external software to the container.
Yet to be able to properly use the containers, users do need to take care of some bindings
-
Some system directories and libraries have to be bound to the container:
-B /var/spool/slurmd,/opt/cray,/usr/lib64/libcxi.so.1The first one is needed to work together with Slurm. The second one contains the MPI and libfabric library. The third one is the actual component that binds libfabric to the Slingshot network adapter and is called the CXI provider and is not needed anymore on the containers built in 2025 as a newer provider library has already been included in those containers.
-
By default your home directory will be available in the container, but as your home directory is not your main workspace, you may want to bind your subdirectory in
/project,/scratchand/or/flashalso, using, e.g.,-B /pfs,/scratch,/projappl,/project,/flash
There are also a number of components that may need further initialisation:
-
The MIOpen library (which is the equivalent of the CUDA cuDNN library) has problems with file/record locking on Lustre so some environment variables are needed to move some work directories to
/tmp. -
RCCL (the ROCm™ equivalent of the NVIDIA NCCL communication library) needs to be told the right network interfaces to use as otherwise it tends to take the interface to the management network of the cluster instead and gets stuck.
-
GPU-aware MPI also needs to be set up (see earlier in the course)
-
Your AI package may need some environment variables too (e.g.,
MASTER_ADDRandMASTER_PORTfor distributed learning with PyTorch)
Moreover, most (if not all at the moment) containers that we provide with Python packages, are
built using Conda to install Python. When entering those containers, conda needs to be activated.
In the newer containers (including all those built in 2025), this is done automatically in
the singularity initialisation process.
Older containers are built in such a way that the environment variable WITH_CONDA provides the
necessary command, so in most cases you only need to run
$WITH_CONDA
as a command in the script that is executed in the container or on the command line. (And in fact, using this in the newer containers will not cause an error or warning.)
Running the containers through EasyBuild-generated modules
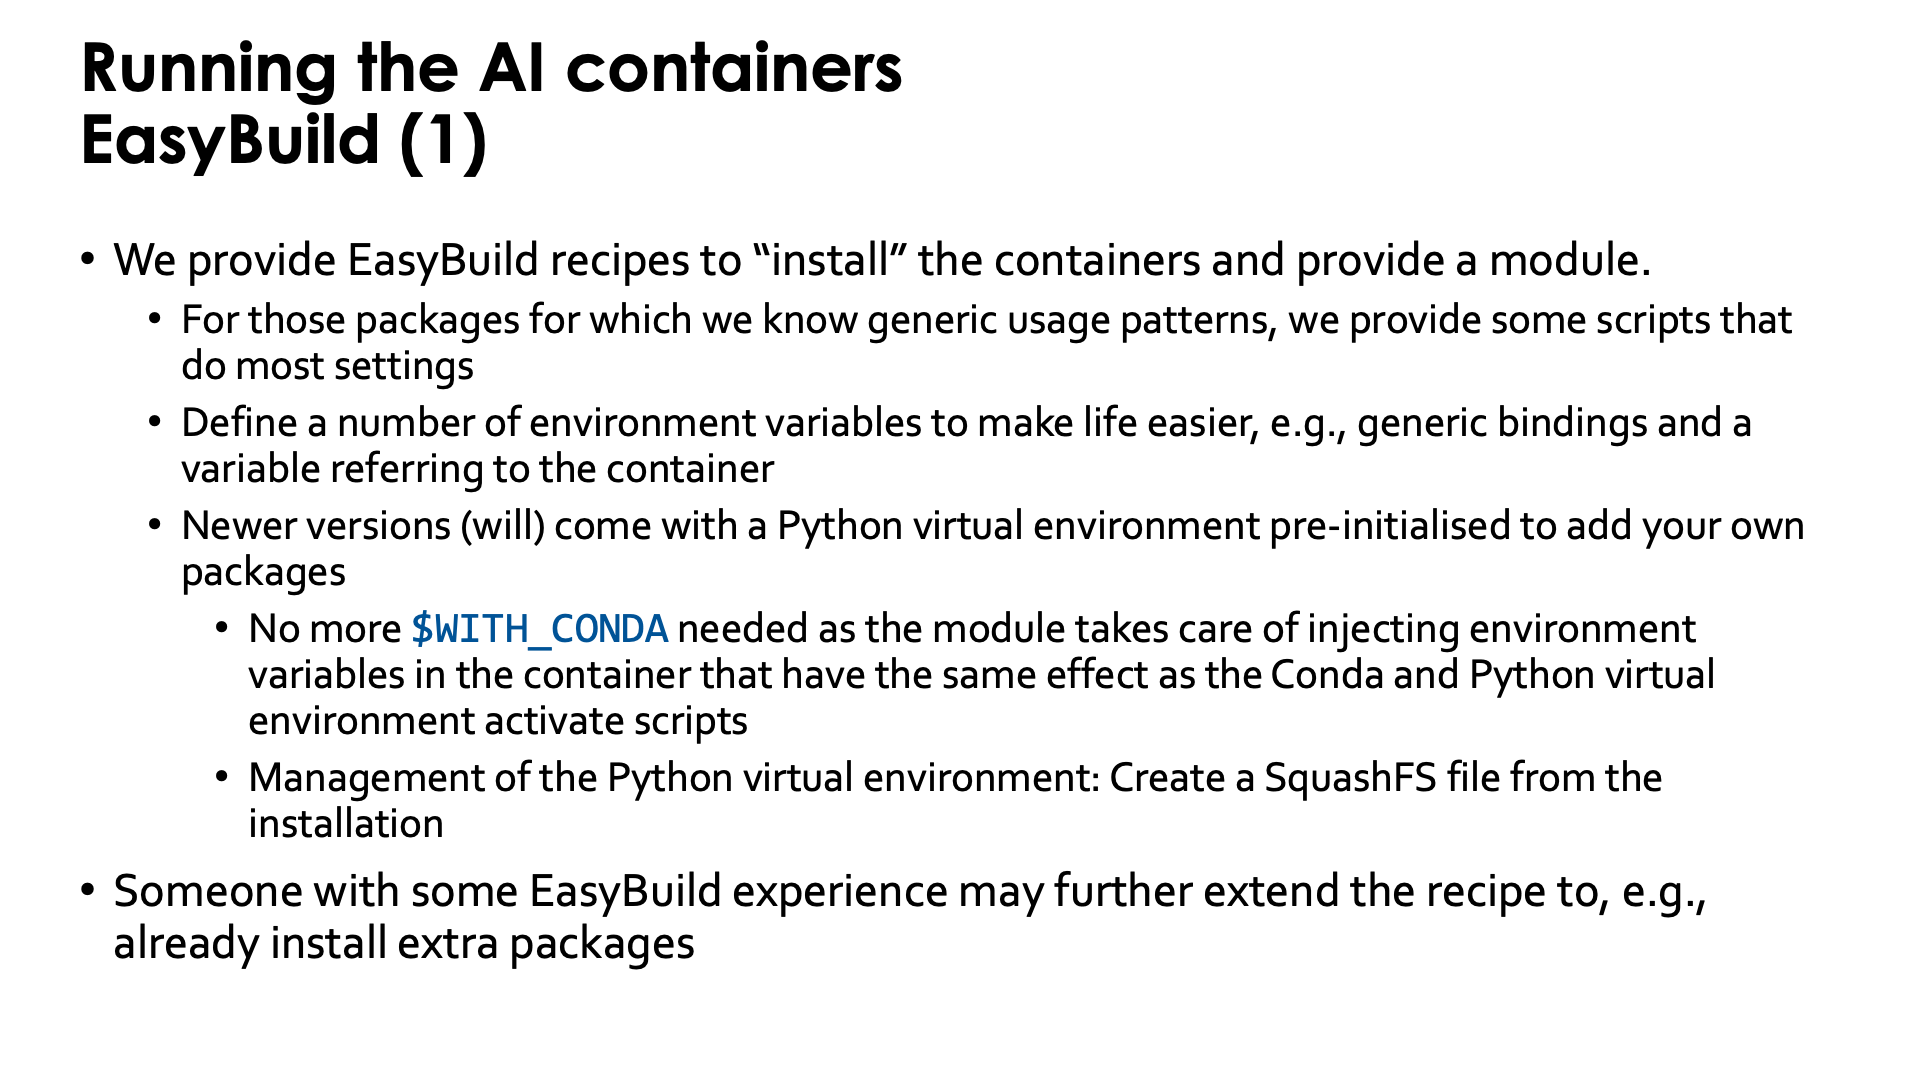
Doing all those initialisations, is a burden. Therefore we provide EasyBuild recipes to "install" the containers and to provide a module that helps setting environment variables in the initialisation.
For packages for which we know generic usage patterns, we provide some scripts that do most settings.
We may have to drop that though, as sometimes there are simply too many scenarios and promoting a particular
one too much may mislead users and encourage them to try to map their problem on an approach which
may be less efficient than theirs.
When using the module, those scripts will be available in the /runscripts directory in the container,
but are also in a subdirectory on the Lustre file system. So in principle you can even edit them or
add your own scripts, though they would be erased if you reinstall the module with EasyBuild.
Some of the newer PyTorch containers (from PyTorch 2.6.0 on) also provide wrapper scripts similar to
the wrapper scripts provided by the CSC pytorch modules,
so many of the examples in their documentation should also work with minimal changes (such as the
module name). They are not fully equivalent though, and that will be discussed below.
The modules also define a number of environment variables that make life easier. E.g., the SINGULARITY_BIND
environment variable is already set to bind the necessary files and directories from the system and to
make sure that your project, scratch and flash spaces are available at the same location as on LUMI so
that even symbolic links in those directories should still work.
We recently started adding a pre-configured virtual environment to the containers to add your own packages.
The virtual environment can be found in the container in a subdirectory of /user-software/venv. To install
packages from within the container, this directory needs to be writeable which is done by binding /user-software to the
$CONTAINERROOT/user-software subdirectory outside the container.
If you add a lot of packages that way, you re-create the filesystem issues that the container is supposed to
solve, but we have a solution for that also. These containers provide the make-squashfs command to generate
a SquashFS file from the installation that will be used by the container instead next time the module for
the container is reloaded. And in case you prefer to fully delete the user-software subdirectory afterwards
from $CONTAINERROOT, it can be re-created using unmake-squashfs so that you can add further packages.
You can also use /user-software to install software in other ways from within the container and can
basically create whatever subdirectory you want into it.
This is basically automating the procedure described
in the "Extending containers with virtual environments for faster testing" lecture of the
AI training provided by the LUMI User Support Team.
These containers with pre-configured virtual environment offer another advantage also: The module injects a number of environment variables into the container so that it is no longer needed to activate the conda environment and Python virtual environment by sourcing scripts.
In fact, someone with EasyBuild experience may even help you to further extend the recipe that we provide to already install extra packages, and we provide an example of how to do that with our PyTorch containers.
Difference between the Python wrapper scrips of the EasyBuild and the CSC modules
The wrapper scripts of the CSC modules are written in such a way that even creating virtual environments with them is supported.
This is not the case with the modules provided via EasyBuild and discussed in the
LUMI Software Library.
The newer PyTorch
and JAX
EasyBuild recipes will install modules that support the python wrapper script, but
there is a single virtual environment already pre-defined and the script will run in
that virtual environment. Because of that restriction, we can easily pack the whole
virtual environment in a SquashFS file for more efficient and Lustre-friendly
execution, which is hard or impossible to do with the CSC wrappers.

Installing the EasyBuild recipes for those containers is also done via the EasyBuild-user module,
but it is best to use a special trick. There is a special partition called partition/container that is
only used to install those containers and when using that partition for the installation, the container
will be available in all versions of the LUMI stack and in the CrayEnv stack.
Installation is as simple as, e.g.,
module load LUMI partition/container EasyBuild-user
eb PyTorch-2.6.0-rocm-6.2.4-python-3.12-singularity-20250404.eb
Before running it is best to clean up (module purge) or take a new shell to avoid conflicts with
environment variables provided by other modules.
The installation with EasyBuild will make a copy from the .sif Singularity container image file
that we provide somewhere in /appl/local/containers
to the software installation subdirectory of your $EBU_USER_PREFIX EasyBuild installation directory.
These files are big and you may wish to delete that file which is easily done: After loading the container
module, the environment variable SIF contains the name with full path of the container file.
After removing the container file from your personal software directory, you need to reload the container
module and from then on, SIF will point to the corresponding container in
/appl/local/containers/easybuild-sif-images.
So:
module load PyTorch/2.6.0-rocm-6.2.4-python-3.12-singularity-20250404
rm –f $SIF
module load PyTorch/2.6.0-rocm-6.2.4-python-3.12-singularity-20250404
We don't really recommend removing the container image though and certainly not if you are interested
in reproducibility. We may remove the image in /appl/local/containers/easybuild-sif-images
without prior notice if we notice that the container has too many problems, e.g., after a system
update. But that same container that doesn't work well for others, may work well enough for you that
you don't want to rebuild whatever environment you built with the container.
Example: Distributed learning without using EasyBuild
To really run this example, some additional program files and data files are needed that are not explained in this text. You can find more information on the PyTorch page in the LUMI Software Library.
In this example, we'll do most of the initialisations inside the container, but different approaches are also possible.
We'll need to create a number of scripts before we can even run the container. The job script alone is not enough as there are also per-task initialisations needed that cannot be done directly in the job script. In this example, we run the script that does the per-task initialisations in the container, but it is also possible to do this outside the container which would give access to the Slurm commands and may even simplify a bit.
If you want to know more about running AI loads on LUMI, we strongly recommend to take a look at the course materials of the AI course. Basically, running AI on AMD GPUs is not that different from NVIDIA GPUs, but there are some initialisations that are different. The main difference may be the difference between cloud environments, clusters with easy access to the compute nodes and clusters like LUMI that require you to always go through the resource manager if you want access to a compute node. We'll need to create a number of scripts before we can even run the container.
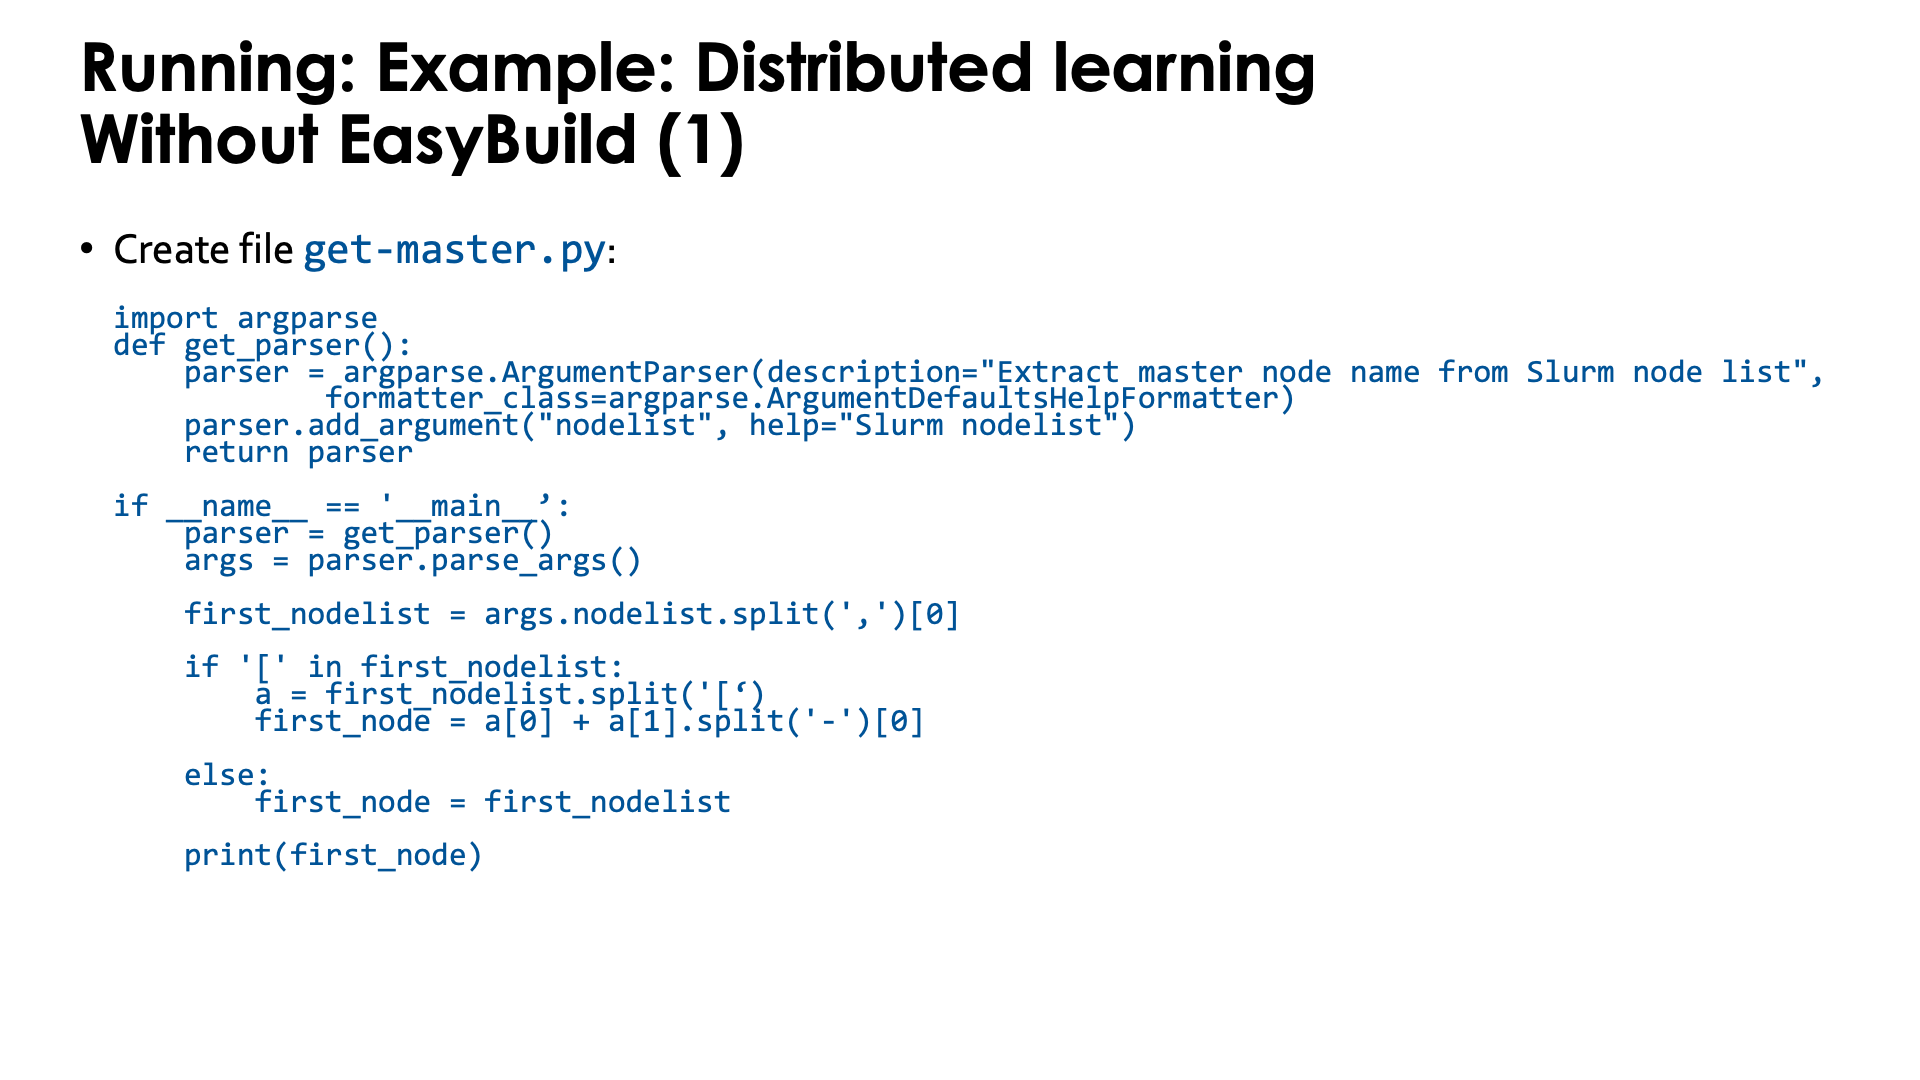
The first script is a Python program to extract the name of the master node from a Slurm environment
variable. This will be needed to set up the communication in PyTorch. Store it in get-master.py:
import argparse
def get_parser():
    parser = argparse.ArgumentParser(description="Extract master node name from Slurm node list",
            formatter_class=argparse.ArgumentDefaultsHelpFormatter)
    parser.add_argument("nodelist", help="Slurm nodelist")
    return parser


if __name__ == '__main__':
    parser = get_parser()
    args = parser.parse_args()

    first_nodelist = args.nodelist.split(',')[0]

    if '[' in first_nodelist:
        a = first_nodelist.split('[')
        first_node = a[0] + a[1].split('-')[0]

    else:
        first_node = first_nodelist

    print(first_node)
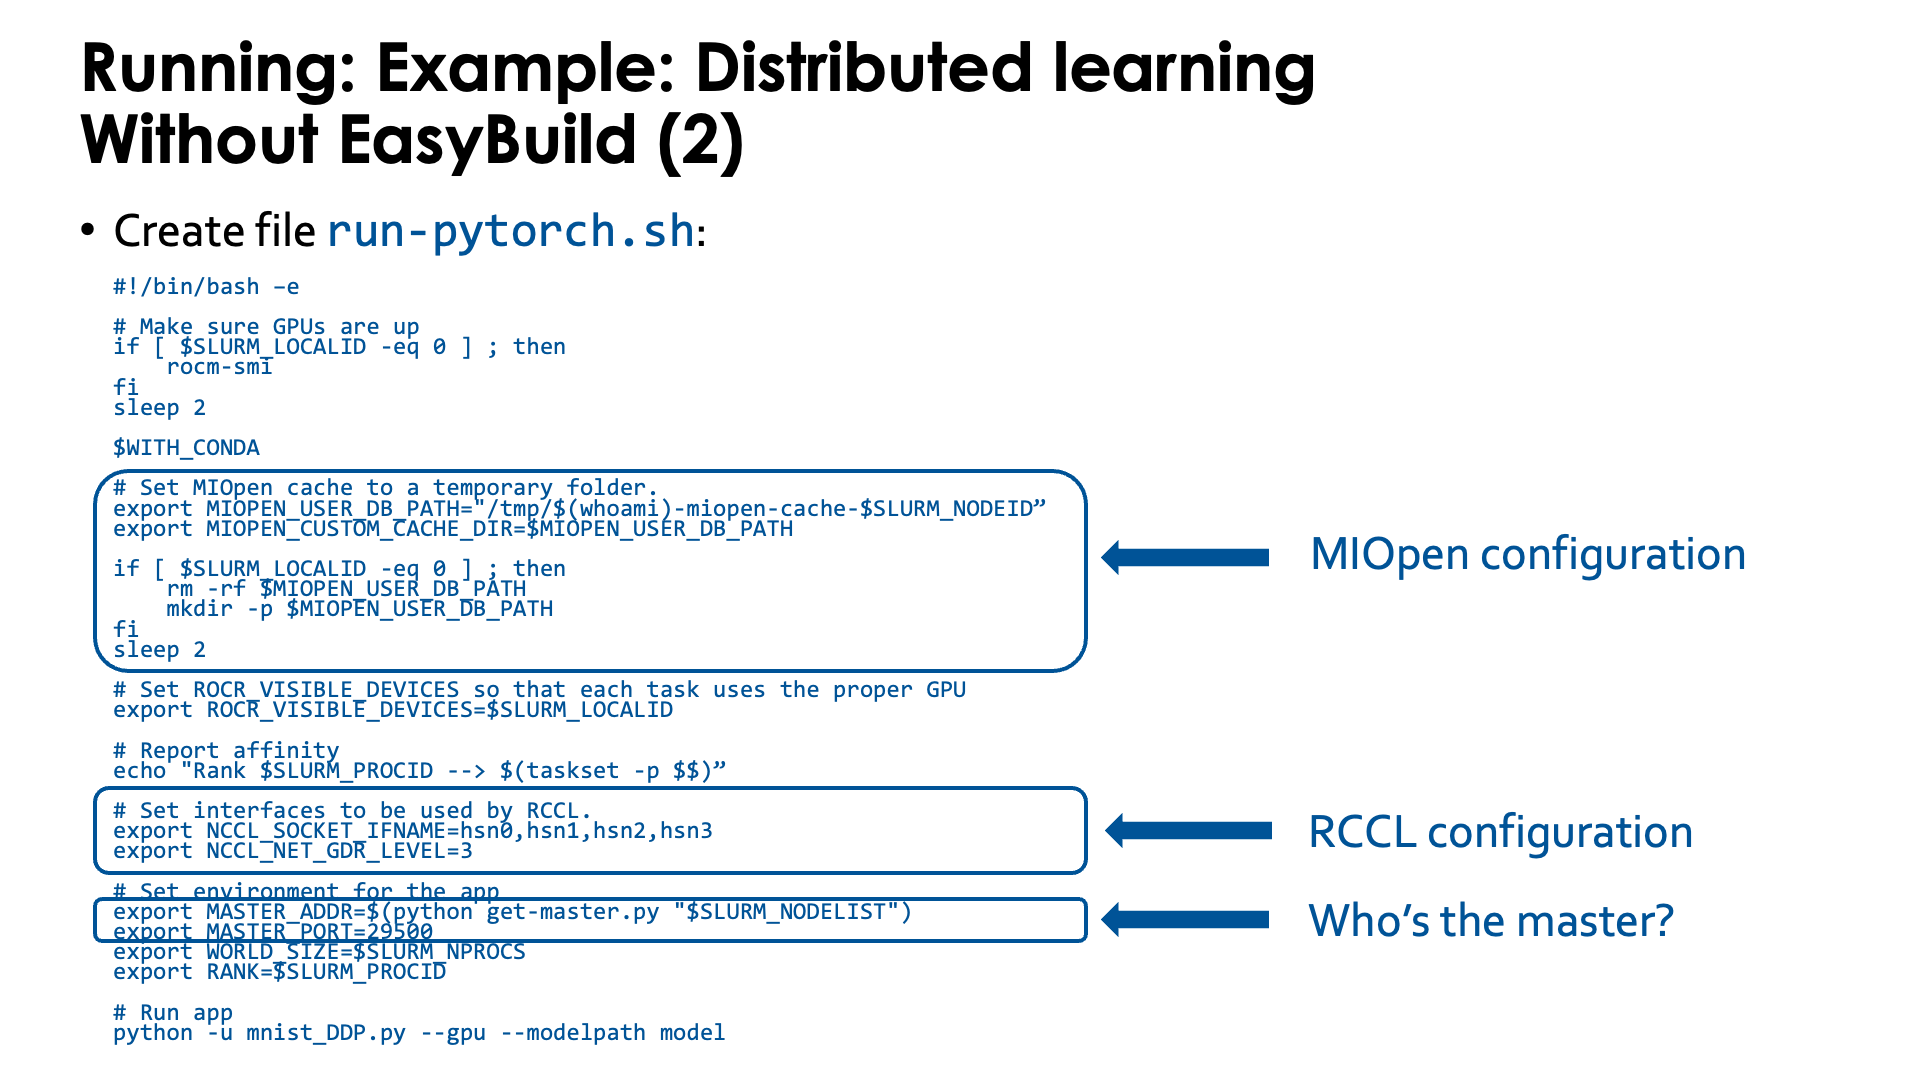
Second, we need a script that we will run in the container. Store the script as
run-pytorch.sh:
#!/bin/bash -e

# Make sure GPUs are up
if [ $SLURM_LOCALID -eq 0 ] ; then
    rocm-smi
fi
sleep 2

# !Remove this if using an image extended with cotainr or a container from elsewhere.!
# Start conda environment inside the container
$WITH_CONDA

# MIOPEN needs some initialisation for the cache as the default location
# does not work on LUMI as Lustre does not provide the necessary features.
export MIOPEN_USER_DB_PATH="/tmp/$(whoami)-miopen-cache-$SLURM_NODEID"
export MIOPEN_CUSTOM_CACHE_DIR=$MIOPEN_USER_DB_PATH

if [ $SLURM_LOCALID -eq 0 ] ; then
    rm -rf $MIOPEN_USER_DB_PATH
    mkdir -p $MIOPEN_USER_DB_PATH
fi
sleep 2

# Optional! Set NCCL debug output to check correct use of aws-ofi-rccl (these are very verbose)
export NCCL_DEBUG=INFO
export NCCL_DEBUG_SUBSYS=INIT,COLL

# Set interfaces to be used by RCCL.
# This is needed as otherwise RCCL tries to use a network interface it has
# no access to on LUMI.
export NCCL_SOCKET_IFNAME=hsn0,hsn1,hsn2,hsn3
# Next line not needed anymore in ROCm 6.2. You may see PHB also instead of 3, which is equivalent
export NCCL_NET_GDR_LEVEL=3

# Set ROCR_VISIBLE_DEVICES so that each task uses the proper GPU
export ROCR_VISIBLE_DEVICES=$SLURM_LOCALID

# Report affinity to check
echo "Rank $SLURM_PROCID --> $(taskset -p $$); GPU $ROCR_VISIBLE_DEVICES"

# The usual PyTorch initialisations (also needed on NVIDIA)
# Note that since we fix the port ID it is not possible to run, e.g., two
# instances via this script using half a node each.
export MASTER_ADDR=$(python get-master.py "$SLURM_NODELIST")
export MASTER_PORT=29500
export WORLD_SIZE=$SLURM_NPROCS
export RANK=$SLURM_PROCID

# Run app
cd /workdir/mnist
python -u mnist_DDP.py --gpu --modelpath model
The script needs to be executable.
The script sets a number of environment variables. Some are fairly standard when using PyTorch on an HPC cluster while others are specific for the LUMI interconnect and architecture or the AMD ROCm environment. We notice a number of things:
-
At the start we just print some information about the GPU. We do this only ones on each node on the process which is why we test on
$SLURM_LOCALID, which is a numbering starting from 0 on each node of the job:if [ $SLURM_LOCALID -eq 0 ] ; then rocm-smi fi sleep 2 -
The container uses a Conda environment internally. So to make the right version of Python and its packages availabe, we need to activate the environment. The precise command to activate the environment is stored in
$WITH_CONDAand we can just call it by specifying the variable as a bash command. -
The
MIOPEN_environment variables are needed to make MIOpen create its caches on/tmpas doing this on Lustre fails because of file locking issues:export MIOPEN_USER_DB_PATH="/tmp/$(whoami)-miopen-cache-$SLURM_NODEID" export MIOPEN_CUSTOM_CACHE_DIR=$MIOPEN_USER_DB_PATH if [ $SLURM_LOCALID -eq 0 ] ; then rm -rf $MIOPEN_USER_DB_PATH mkdir -p $MIOPEN_USER_DB_PATH fiThese caches are used to store compiled kernels.
-
It is also essential to tell RCCL, the communication library, which network adapters to use. These environment variables start with
NCCL_because ROCm tries to keep things as similar as possible to NCCL in the NVIDIA ecosystem:export NCCL_SOCKET_IFNAME=hsn0,hsn1,hsn2,hsn3 export NCCL_NET_GDR_LEVEL=3Without this RCCL may try to use a network adapter meant for system management rather than inter-node communications!
-
We also set
ROCR_VISIBLE_DEVICESto ensure that each task uses the proper GPU. This is again based on the local task ID of each Slurm task. -
Furthermore some environment variables are needed by PyTorch itself that are also needed on NVIDIA systems.
PyTorch needs to find the master for communication which is done through the
get-master.pyscript that we created before:export MASTER_ADDR=$(python get-master.py "$SLURM_NODELIST") export MASTER_PORT=29500As we fix the port number here, the
conda-python-distributedscript that we provide, has to run on exclusive nodes. Running, e.g., 2 4-GPU jobs on the same node with this command will not work as there will be a conflict for the TCP port for communication on the master asMASTER_PORTis hard-coded in this version of the script.
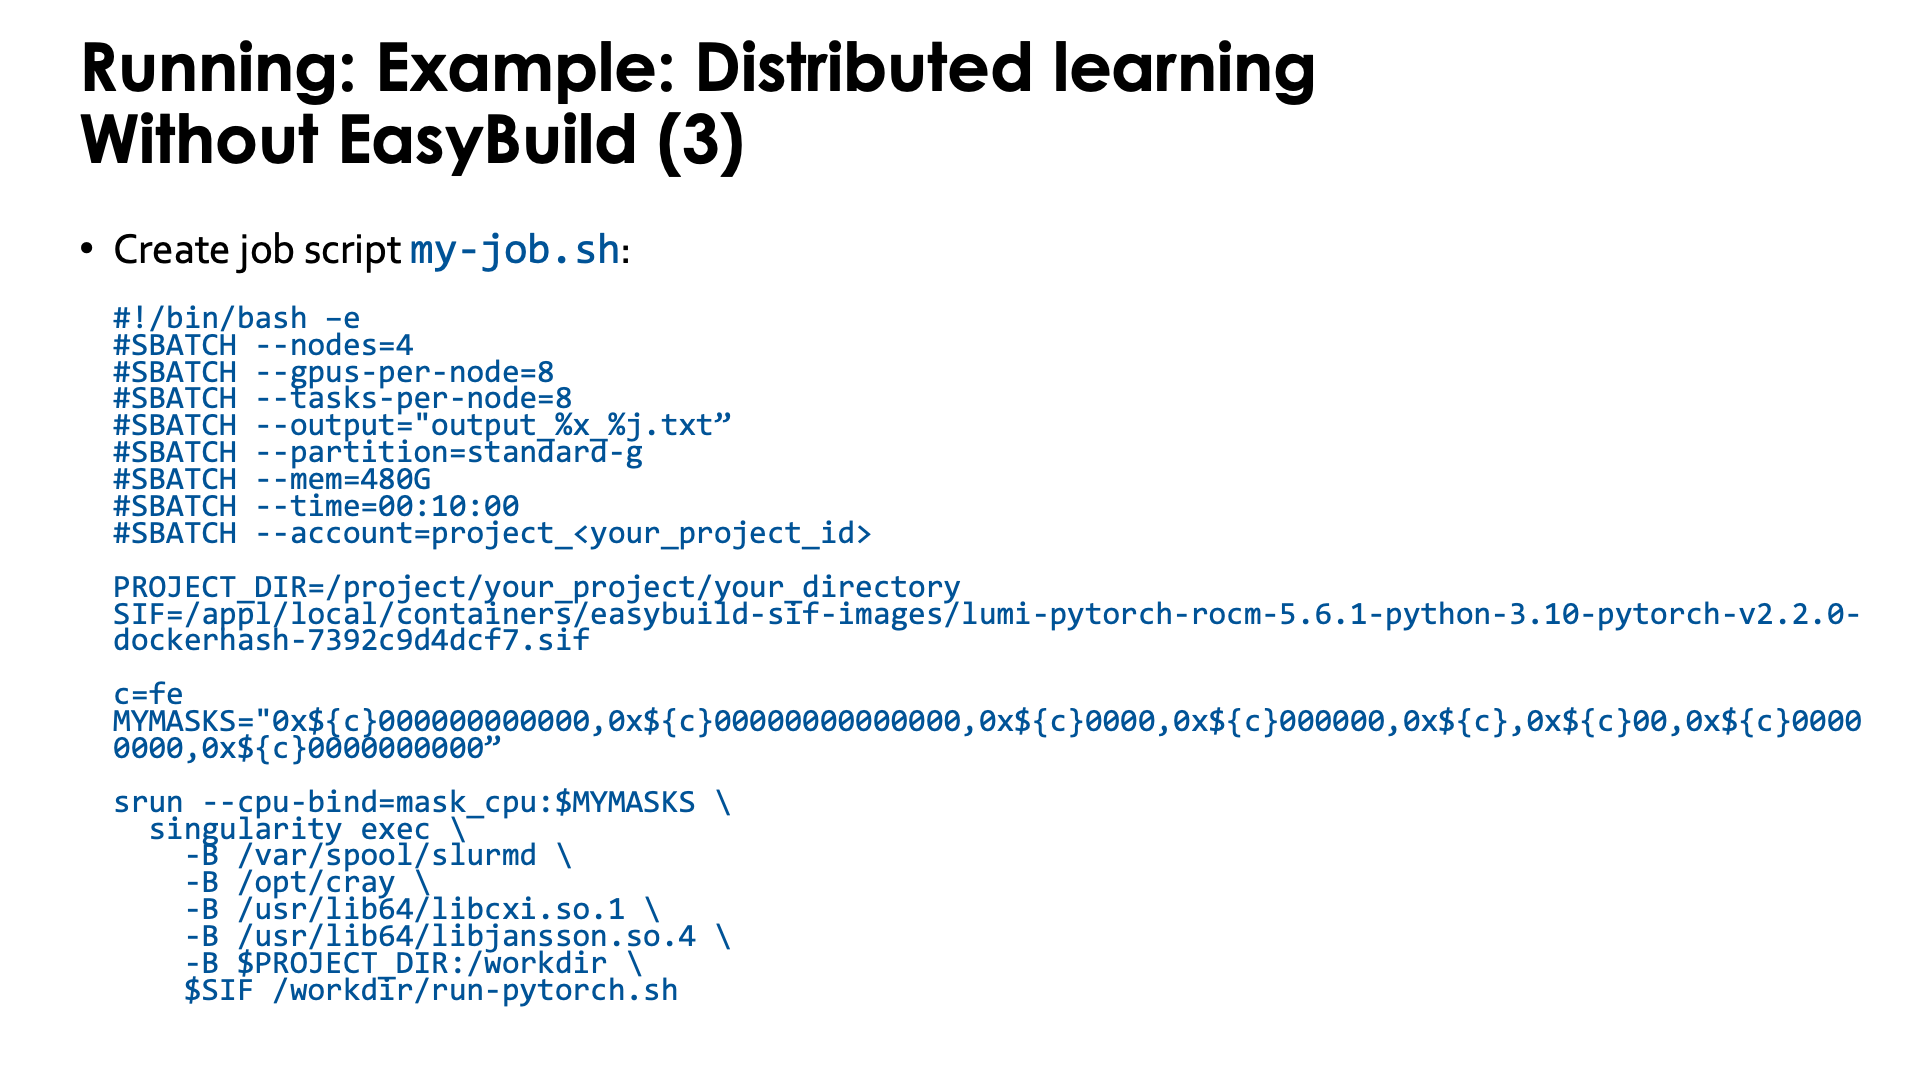
And finally you need a job script that you can then submit with sbatch. Lets call it my-job.sh:
#!/bin/bash -e
#SBATCH --nodes=4
#SBATCH --gpus-per-node=8
#SBATCH --tasks-per-node=8
#SBATCH --output="output_%x_%j.txt"
#SBATCH --partition=standard-g
#SBATCH --mem=480G
#SBATCH --time=00:10:00
#SBATCH --account=project_<your_project_id>

CONTAINER=your-container-image.sif

c=fe
MYMASKS="0x${c}000000000000,0x${c}00000000000000,0x${c}0000,0x${c}000000,0x${c},0x${c}00,0x${c}00000000,0x${c}0000000000"

srun --cpu-bind=mask_cpu:$MYMASKS \
  singularity exec \
    -B /var/spool/slurmd \
    -B /opt/cray \
    -B /usr/lib64/libcxi.so.1 \
    -B /usr/lib64/libjansson.so.4 \
    -B $PWD:/workdir \
    $CONTAINER /workdir/run-pytorch.sh
The important parts here are:
-
We start PyTorch via
srunand this is recommended. Thetorchruncommand has to be used with care as not all its start mechanisms are compatible with LUMI. -
We also use a particular CPU mapping so that each rank can use the corresponding GPU number (which is taken care of in the
run-pytorch.shscript). We use the "Linear assignment of GCD, then match the cores" strategy. -
Note the bindings. In this case we do not even bind the full
/project,/scratchand/flashsubdirectories, but simply make the current subdirectory that we are using outside the container available as/workdirin the container. This also implies that any non-relative symbolic link or any relative symbolic link that takes you out of the current directory and its subdirectories, will not work, which is awkward as you may want several libraries to run from to have simultaneous jobs, but, e.g., don't want to copy your dataset to each of those directories.
Example: Distributed learning with the EasyBuild-generated module
To really run this example, some additional program files and data files are needed that are not explained in this text. You can find more information on the PyTorch page in the LUMI Software Library.
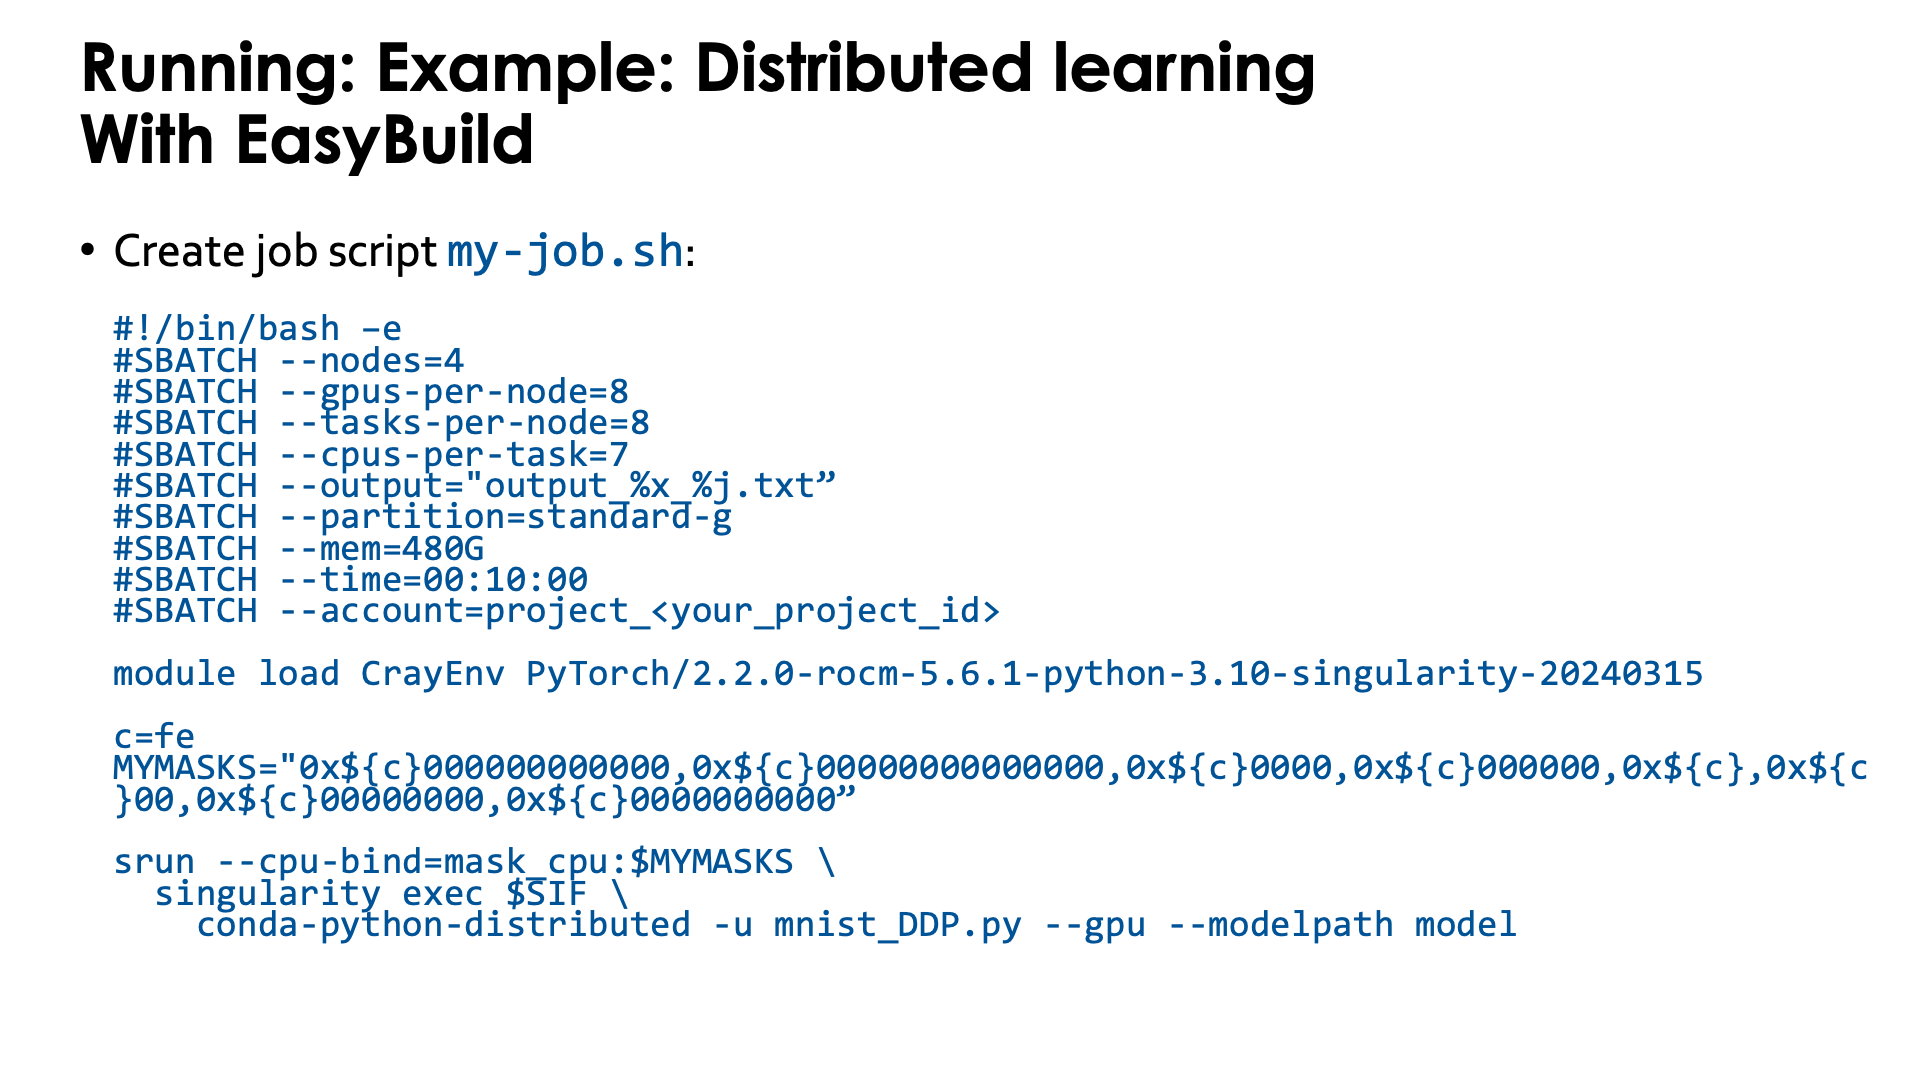
It turns out that the first two above scripts in the example above, are fairly generic.
Therefore the module provides a slight variant of the second script, now called conda-python-distributed,
that at the end calls python, passing it all arguments it got and hence can be used to start other Python code also.
It is in $CONTAINERROOT/runscripts or in the container as /runscripts.
As the module also takes care of bindings, the job script is simplified to
#!/bin/bash -e
#SBATCH --nodes=4
#SBATCH --gpus-per-node=8
#SBATCH --tasks-per-node=8
#SBATCH --output="output_%x_%j.txt"
#SBATCH --partition=standard-g
#SBATCH --mem=480G
#SBATCH --time=00:10:00
#SBATCH --account=project_<your_project_id>

module load LUMI  # Which version doesn't matter, it is only to get the container.
module load PyTorch/2.6.0-rocm-6.2.4-python-3.12-singularity-20250404

c=fe
MYMASKS="0x${c}000000000000,0x${c}00000000000000,0x${c}0000,0x${c}000000,0x${c},0x${c}00,0x${c}00000000,0x${c}0000000000"

cd mnist
srun --cpu-bind=mask_cpu:$MYMASKS \
  singularity exec $SIFPYTORCH \
    conda-python-distributed -u mnist_DDP.py --gpu --modelpath model
So basically you only need to take care of the proper CPU bindings where we again use the "Linear assignment of GCD, then match the cores" strategy.
Extending the containers
We can never provide all software that is needed for every user in our containers. But there are several mechanisms that can be used to extend the containers that we provide:
Extending the container with cotainr
The example in this section is outdated.
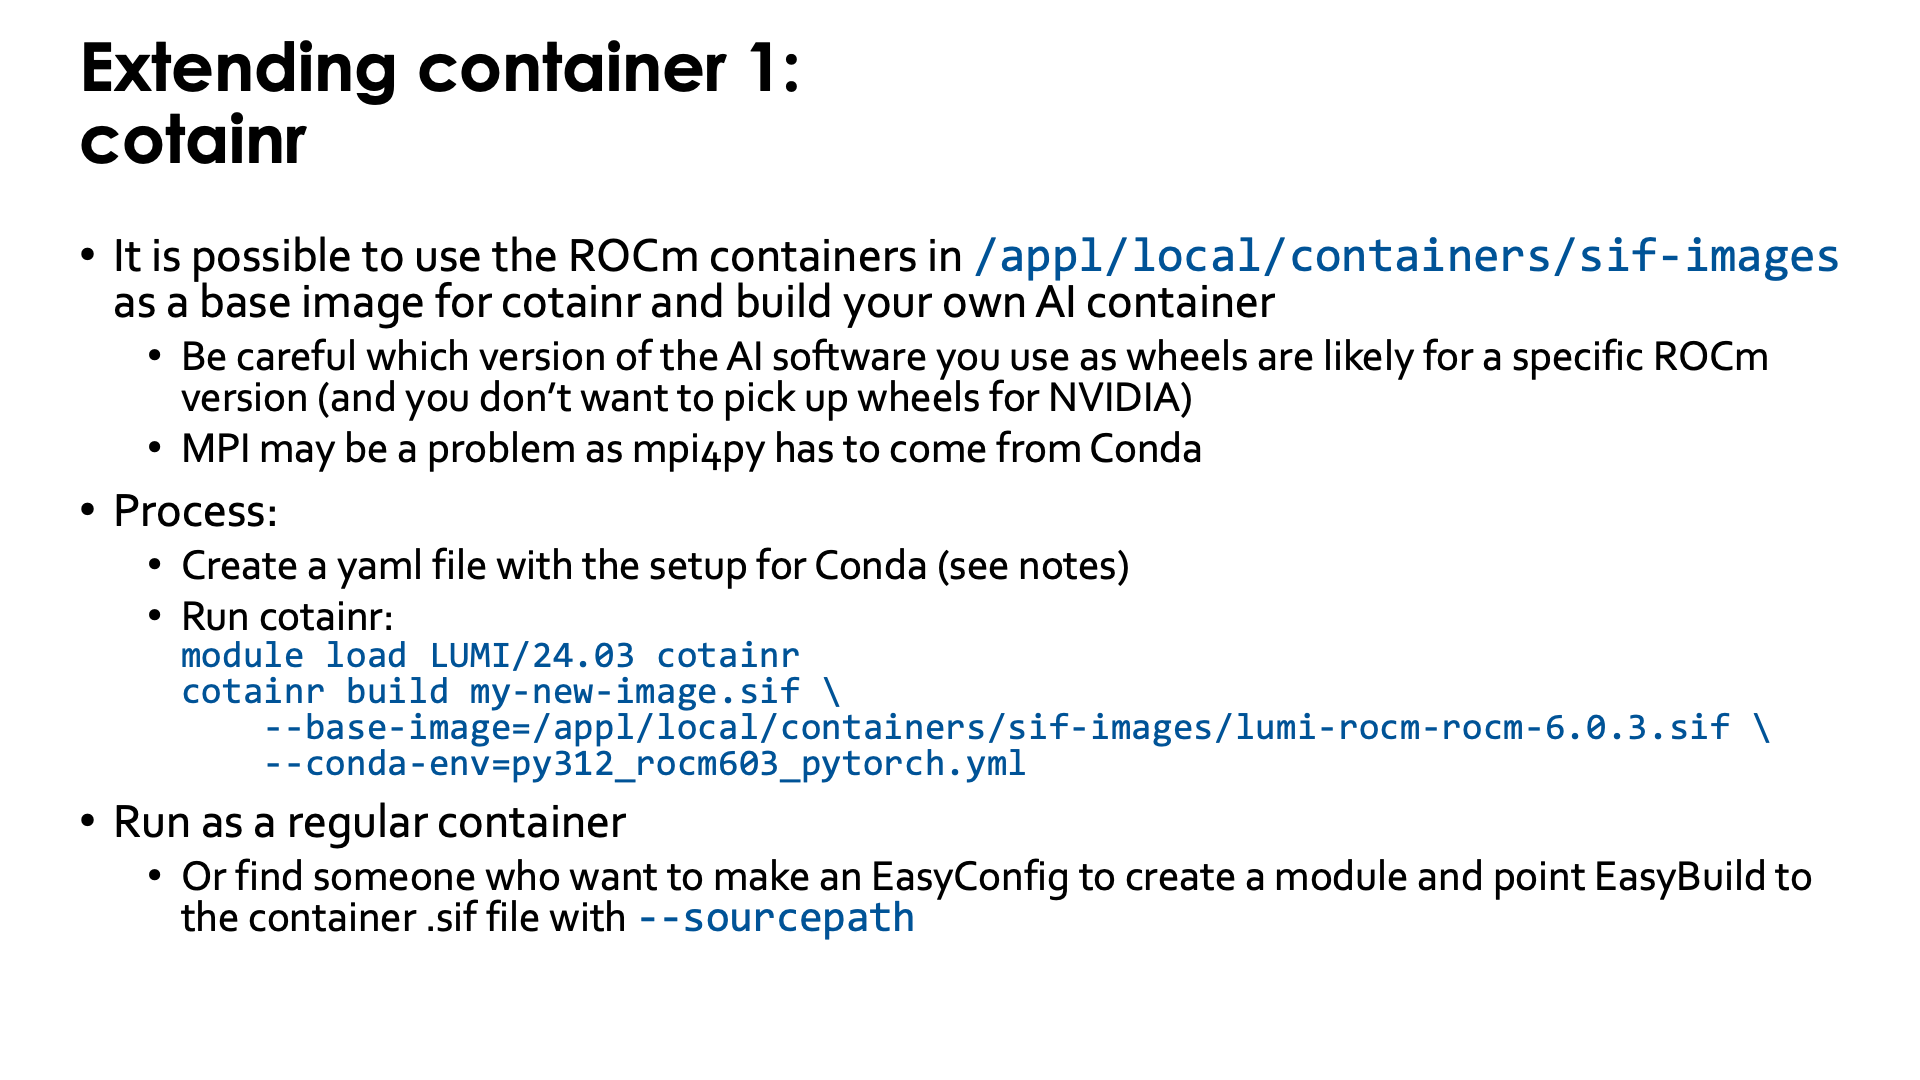
The LUMI Software Library offers some container images for ROCm™. Though these images can be used simply to experiment with different versions of ROCm, an important use of those images is as base images for the cotainr tool that supports Conda to install software in the container.
Some care is needed though when you want to build your own AI containers. You need to ensure that binaries for AMD GPUs are used,
as by default you may get served NVIDIA-only binaries. MPI can also be a problem, as the base image does not yet provide,
e.g., a properly configures mpi4py (which would likely be installed in a way that conflicts with cotainr).
The container images that we provide can be found in the following directories on LUMI:
-
/appl/local/containers/sif-images: Symbolic link to the latest version of the container for each ROCm version provided. Those links can change without notice! -
/appl/local/containers/tested-containers: Tested containers provided as a Singularity .sif file and a docker-generated tarball. Containers in this directory are removed quickly when a new version becomes available. -
/appl/local/containers/easybuild-sif-images: Singularity .sif images used with the EasyConfigs that we provide. They tend to be available for a longer time than in the other two subdirectories.
First you need to create a yaml file to tell Conda which is called by cotainr which packages need to be installed.
This is also discussed in
"Using the images as base image for cotainr" section of the LUMI Software Library rocm page.
For example, to create a PyTorch installation for ROCm 6.0.3, one can first create the
YAML file py312_rocm603_pytorch.yml with content
name: py312_rocm603_pytorch.yml
channels:
  - conda-forge
dependencies:
  - filelock=3.15.4
  - fsspec=2024.9.0
  - jinja2=3.1.4
  - markupsafe=2.1.5
  - mpmath=1.3.0
  - networkx=3.3
  - numpy=2.1.1
  - pillow=10.4.0
  - pip=24.0
  - python=3.12.3
  - sympy=1.13.2
  - typing-extensions=4.12.2
  - pip:
    - --extra-index-url https://download.pytorch.org/whl/rocm6.0/
    - pytorch-triton-rocm==3.0.0
    - torch==2.4.1+rocm6.0
    - torchaudio==2.4.1+rocm6.0
    - torchvision==0.19.1+rocm6.0
Next we need to run cotainr with the right base image to generate the container:
module load LUMI/25.03 cotainr
cotainr build my-new-image.sif \
    --base-image=/appl/local/containers/sif-images/lumi-rocm-rocm-6.0.3.sif \
    --conda-env=py312_rocm603_pytorch.yml
or, as for the current version of cotainr in LUMI/24.03 this image is actually the base image for the lumi-g preset:
module load LUMI/25.03 cotainr
cotainr build my-new-image.sif \
    --system=lumi-g \
    --conda-env=py312_rocm603_pytorch.yml
The cotainr command takes three arguments in this example:
-
my-new-image.sifis the name of the container image that it will generate. -
--base-image=/appl/local/containers/sif-images/lumi-rocm-rocm-6.0.3.sifpoints to the base image that we will use, in this case the latest version of the ROCm 6.0.3 container provided on LUMI.This version was chosen for this case as ROCm 6.0.3 version corresponding to the driver on LUMI at the time of writing (early February 2025), but with that driver we could also have chosen PyTorch versions that require ROCm 6.1 or 6.2.
-
--conda-env=py312_rocm603_pytorch.yml: The YAML file with the environment definition.
The result is a container for which you will still need to provide the proper bindings to some libraries on the system (to interface
properly with Slurm and so that RCCL with the OFI plugin can work) and to your spaces in the file system that you want to use. Use, e.g., singularity-AI-bindings which should work for many cases.
Or you can adapt an EasyBuild-generated module for the ROCm container that you used to use your container instead (which will require
the EasyBuild eb command flag --sourcepath to specify where it can find the container that you generated, and you cannot delete
it from the installation afterwards).
Note that cotainr can build upon the ROCm™ containers that are provided on LUMI, but not
upon containers that already contain a Conda installation. It cannot extend an existing Conda
installation in a container.
Course lecture on cotainr
The "Moving your AI training jobs to LUMI" course has a session "Building containers from Conda/pip environments" (link to the materials of the course in October 2025) with examples and exercises for this approach.
Extending the container with the singularity unprivileged proot build
Singularity specialists can also build upon an existing container using singularity build.
The options for build processes are limited though because we have no support for user namespaces or the fakeroot feature.
The "Unprivileged proot builds" feature from recent SingularityCE versions
is supported though.
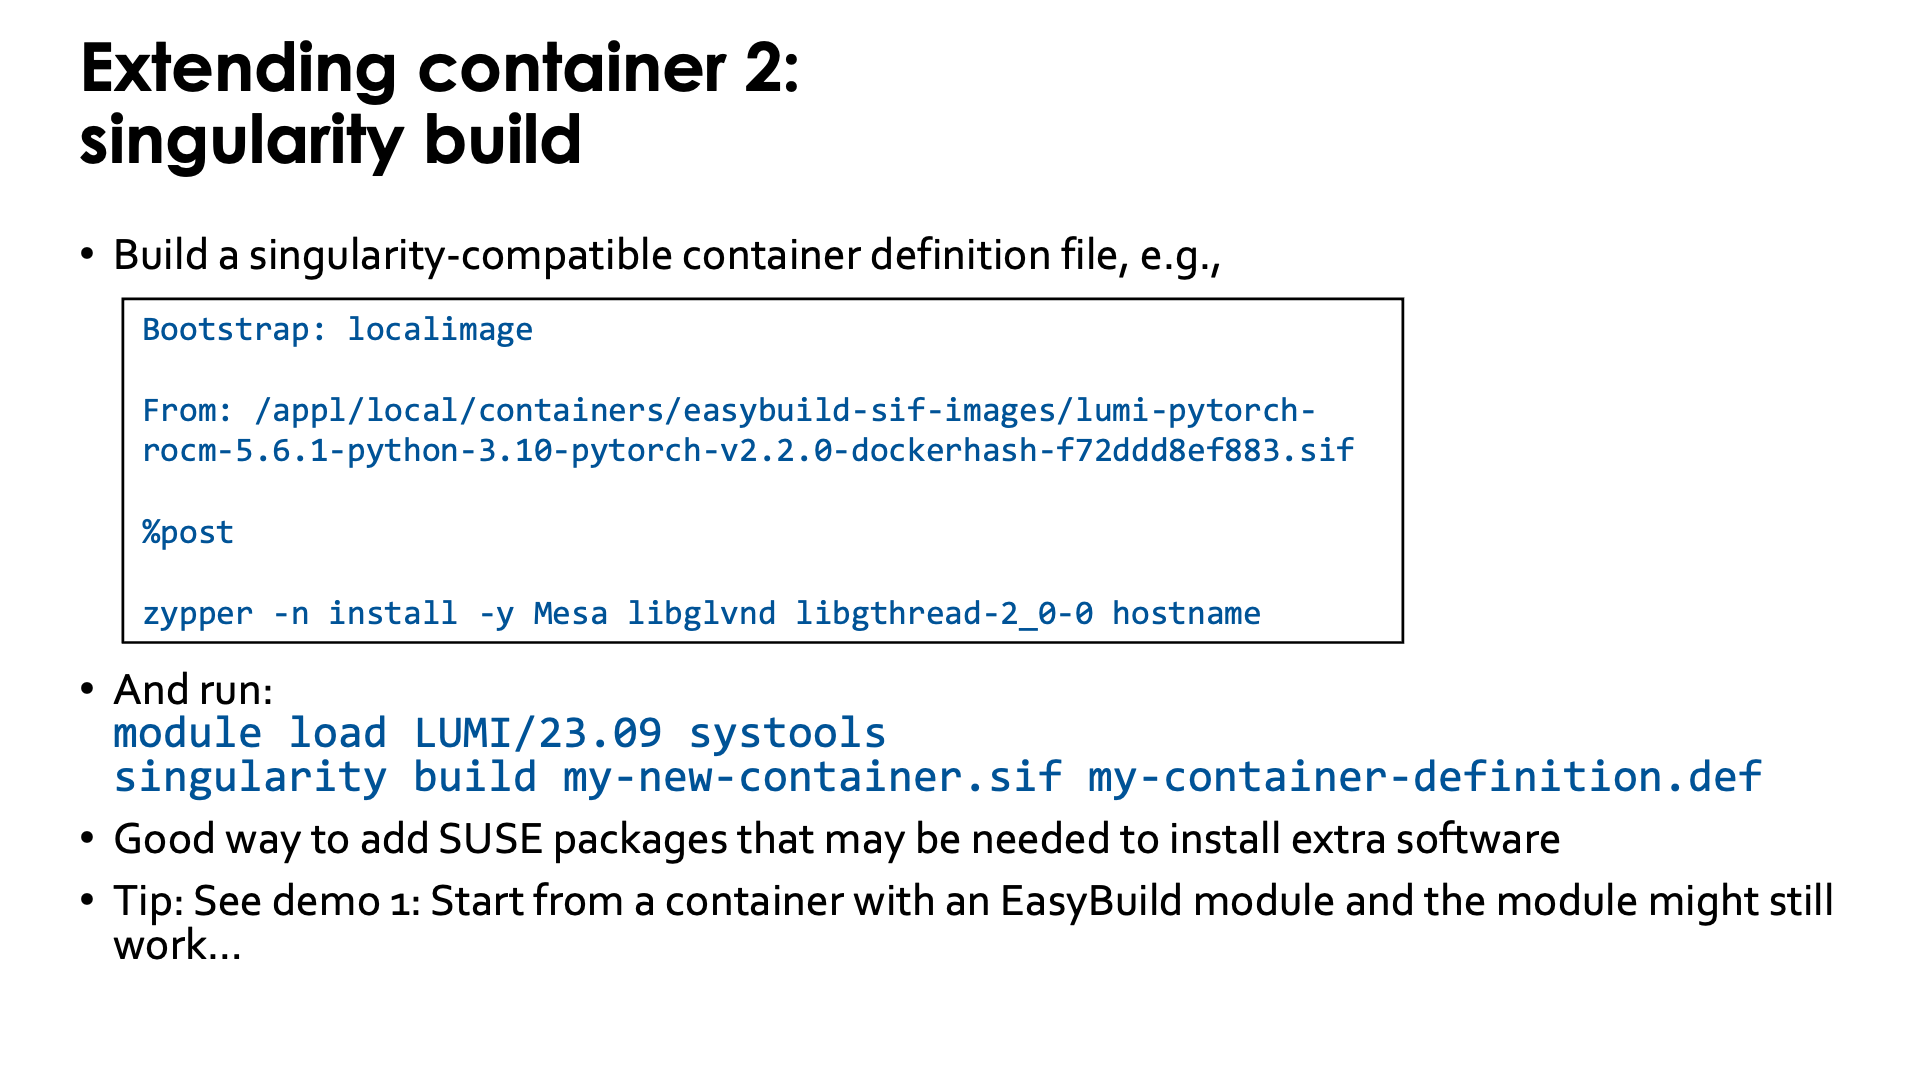
To use this feature, you first need to write a singularity-compatible container definition file, e.g.,
Bootstrap: localimage

From: /appl/local/containers/easybuild-sif-images/lumi-pytorch-rocm-6.2.4-python-3.12-pytorch-v2.7.1-dockerhash-0d479e852886.sif

%post

zypper -n install -y Mesa libglvnd libgthread-2_0-0 hostname
which is a definition file that will use the SUSE zypper software installation tool to add a number of packages
to one of the LUMI PyTorch containers to provide support for software OpenGL rendering (the CDNA GPUs do not support
OpenGL acceleration) and the hostname command.
To use the singularity build command, we first need to make the proot command available. This is currently
not installed in the LUMI system image, but is provided by the systools/24.03 and later modules that can be
found in the corresponding LUMI stack and in the CrayEnv environment or by the PRoot module in all
LUMI stacks and the CrayEnv stack.
To update the container, run:
module load LUMI/25.03 PRoot
singularity build my-new-container.sif my-container-definition.def
Note that the singularity build command takes two options:
The first one is the name of the new container image that it
generates and the second one is the container definition file.
When starting from a base image installed with one of our EasyBuild recipes, it is possible to overwrite the image file and in fact, the module that was generated with EasyBuild might just work...
Extending the container through a Python virtual environment
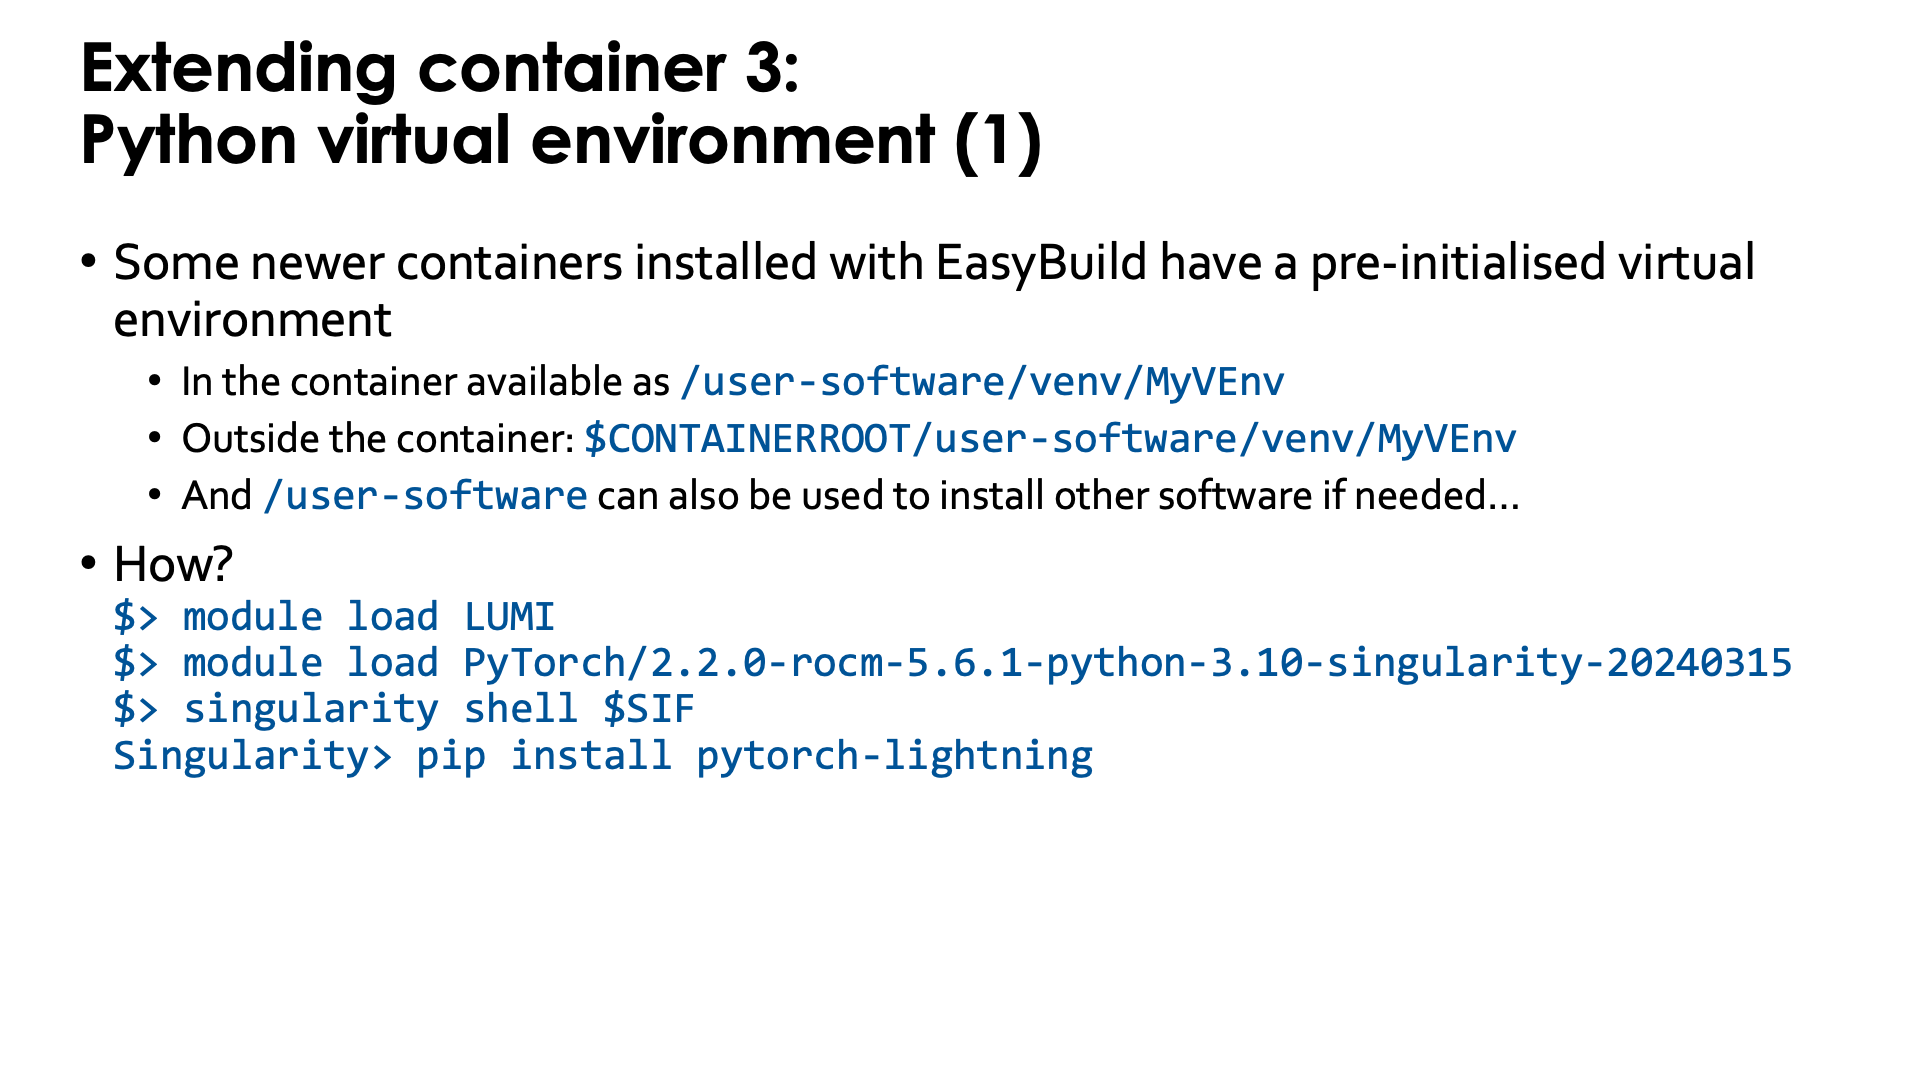
Some newer containers installed with EasyBuild already include a pre-initialised virtual environment
(created with venv). The location in the filesystem of that virtual environment is:
-
/user-software/venv/MyVEnvin the container, whereMyVEnvis actually different in different containers. We used the same name as for the Conda environment. -
$CONTAINERROOT/user-software/venv/MyVEnvoutside the container (unless that directory structure is replaced with the$CONTAINERROOT/user-software.squashfsfile).
That directory structure was chosen to (a) make it possible to install a second virtual environment in /user-software/venv while
(b) also leaving space to install software by hand in /user-software and hence create a bin and lib subdirectory in those
(though they currently are not automatically added to the search paths for executables and shared libraries in the container).
The whole process is very simple with those containers that already have a pre-initialised virtual environment as the module already initialises several environment variables in the container that have the combined effect of activating both the Conda installation and then on top of it, the default Python virtual environment.
Outside the container, we need to load the container module, and then we can easily go into the container using the SIF
environment variable to point to its name:
module load LUMI
module load PyTorch/2.7.1-rocm-6.2.4-python-3.12-singularity-20250827
singularity shell $SIF
and in the container, at the Singularity> prompt, we can use pip install without extra options, e.g.,
pip install pytorch-lightning
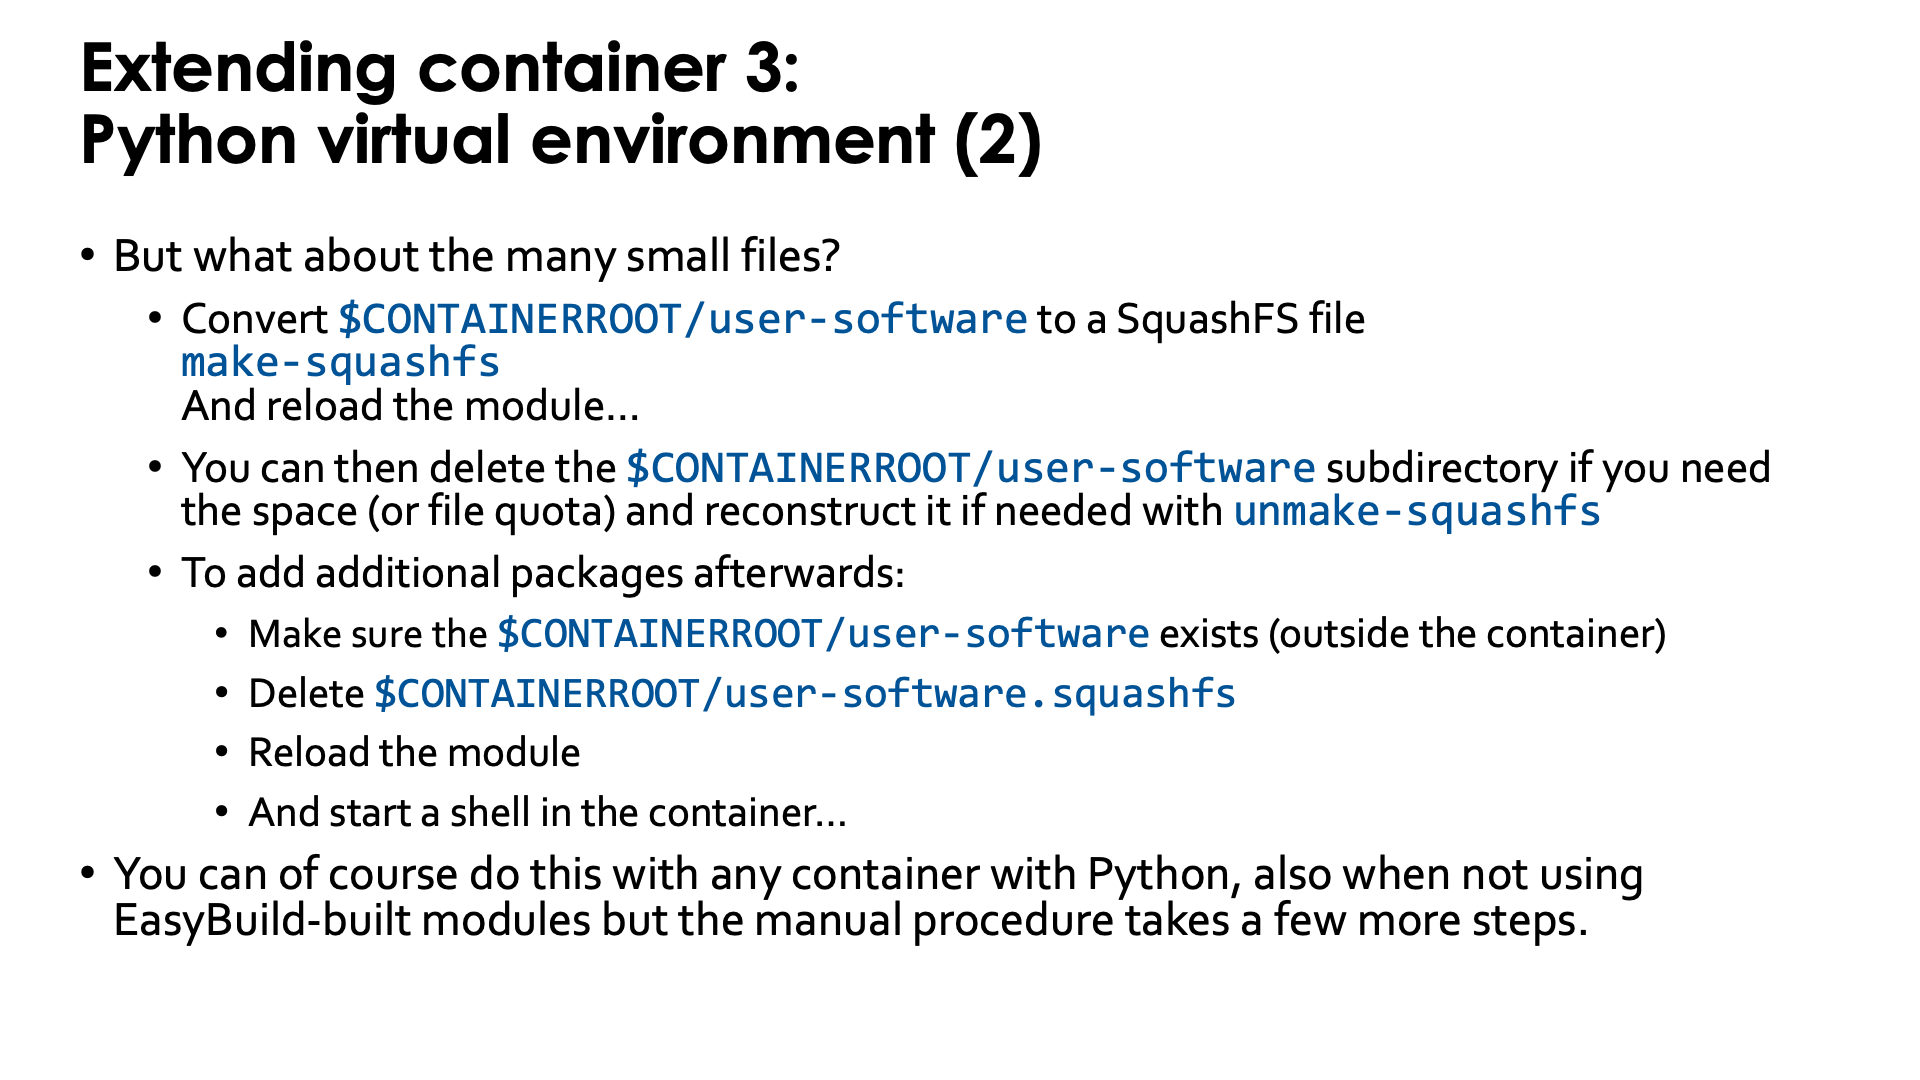
As already discussed before in this session of the tutorial, such a Python virtual environment has the potential
to create a lot of small files in the Lustre $CONTAINERROOT/user-software subdirectory, which can wipe out
all benefits we got from using a container for the Python installation. But our modules with virtual environment
support offer a solution for this also: the make-squashfs command (which should be run outside the container)
will convert the user-software subdirectory in $CONTAINERROOT into the SquashFS file user-software.squashfs
which, after reloading the module, will be used to provide the /user-software subdirectory in the container.
The downside is that now /user-software is read-only as it comes from the SquashFS file. To install further
packages, you'd have to remove the user-software.squashfs file again and reload the container module.
Currently the make-squashfs file will not remove the $CONTAINERROOT/user-software subdirectory, but once
you have verified that the SquashFS file is OK and useable in the container, you can safely delete it yourself.
We also provide the unmake-squashfs script to re-generate the $CONTAINERROOT/user-software subdirectory
(though attributes such as file time, etc., will not be the same as before).
It is of course possible to use this technique with all Python containers, but you may have to do a lot more steps by hand, such as adding the binding for a directory for the virtual environment, creating and activating the environment, and replacing the directory with a SquashFS file to improve file system performance.